How to Add Cloudflare Turnstile CAPTCHA to Contact Form 7
Important!
At this time the explanation on this page includes two of three steps required to activate Cloudflare Turnstile CAPTCHA, you will need to implement a server-side logic as well to complete the setup. The server side logic might be added in the future. Contributions are welcomed.
When writing this short “how to” article, there was no way to add CloudFlare Turnstile CAPTCHA to Contact Form 7 directly from the CF7 plugin; rather, the only option was another plugin that would add that functionality to Contact Form 7. However, there is an easier way to add the Turnstile CAPTCHA to CF7 without adding any additional third-party scripts. All you need is two lines of code. So let’s get started.
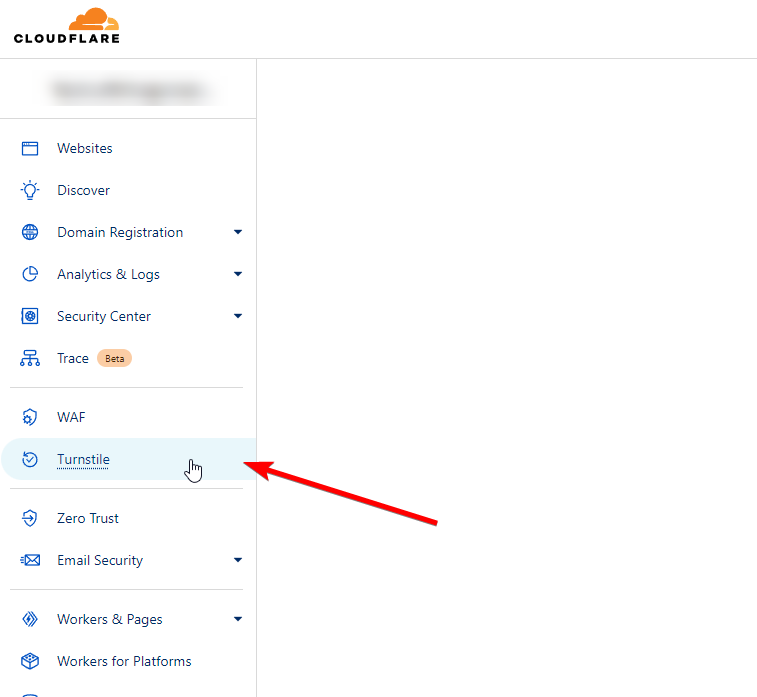
First, we need to get the Turnstile CAPTCHA key for our website. The only thing difficult about that is finding where Turnstile is located in the huge Cloudflare interface. To find it, do not choose any websites or sites you have with Cloudflare. Without selecting any site, go through the left menu. Approximately in the middle of the menu, you will see the Turnstile menu option.
Now it’s easy:
- Select the Turnstile menu option
- Click Add Widget
- Give the widget a name Could be something like “Turnstile CAPTCHA for my X website”
- Select the website from the list
- Save and you got yourself the Turnstile site key
Keep that window open, as we will be using that key in a second. Now that we have our key, let’s go to the WordPress side. As I mentioned, we have two lines of code we need to add to the form where we need the CAPTCHA. Go to your WordPress site and open one of your Contact Form 7 forms. Below, I’ll add an example of a CF7 form.
<label> Your Name (required)
    [text* your-name] </label>

<label> Your Email (required)
    [email* your-email] </label>

<label> Subject
    [text your-subject] </label>

<label> Your Message
    [textarea your-message] </label>
[submit "Send"]
and add this line <div class="cf-turnstile" data-sitekey="{your site key}"></div> just before the [submit "Send"] like this
<label> Your Name (required)
    [text* your-name] </label>

<label> Your Email (required)
    [email* your-email] </label>

<label> Subject
    [text your-subject] </label>

<label> Your Message
    [textarea your-message] </label>

<div class="cf-turnstile" data-sitekey="{your site key}"></div>  <---- here

[submit "Send"]
Now for the second line of code. Let’s go to the page with the contact form on it. At the top of that page, add a “Raw HTML” element; it might be named differently in your setup, but what you’re looking for is a way to add HTML to your WordPress page or post. Once you have added that element, insert this line into it, and save.
<script src="https://challenges.cloudflare.com/turnstile/v0/api.js" defer></script>
When you publish the page or preview it, you will see the Turnstile CAPTCHA validation in the form. The advantage of this approach is that this code is more private than Google’s reCAPTCHA and does not need to be run on each page, in addition to showing the reCAPTCHA icon on each page, even though it’s not needed on that page. If you have ever added Google’s reCAPTCHA to Contact Form Seven through its integration, you are well aware of the reCAPTCHA icon’s presence on each page of your website. Now you can use Cloudflare’s CAPTCHA without that hassle on your website.